
Ryoko Mobile Wifi User Guide
👋 Hi! Our team is happy introduce you to a short guide how to use Ryoko Mobile Wifi. Click on the topic that interests you.
Setting Up Your Device Resetting To Factory SettingsSetting Up Your Device
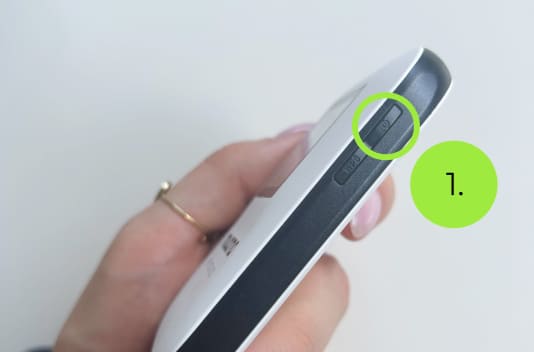

Turn on Ryoko by pressing and holding the power button on the top-right side of the device, until the display turns on. In case the device does not turn on, charge the device by using the included micro usb cable. Connect the cable to the micro usb port, which you will find at the bottom of the Ryoko device.


-
Once it is turned on, press the WPS button below the power button and choose the most convenient way to connect:
Connect manually using the Wifi name and password shown on the Ryoko device (access it by clicking the WPS button until this info is shown)
Or connect automatically using the QR code that you can find on the display by clicking WPS button


Connect your phone, laptop and any other WiFI capable device by entering the WiFi details or scanning the QR code.

-
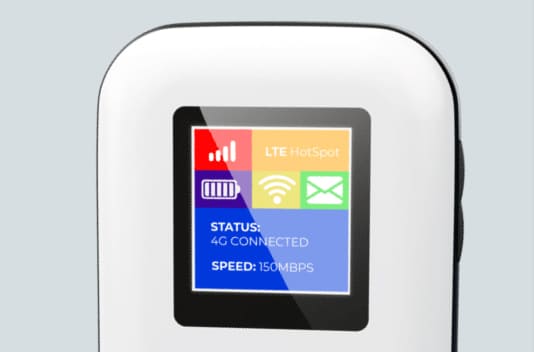
Once you connect to Ryoko:
- You can see the number of connected devices on the screen;
- In addition, you can also see the battery status;
- And the signal strength icon.
Resetting To Factory Settings


In case the device does not work as supposed to, you can reset the factory settings of the Ryoko device by:
Making sure the device is powered on (turn on the device).
Removing the back cover of the device.
Locating the reset hole just below the battery (on the bottom back of the Ryoko).
Use a sim card tool, paper clip or any other applicable thing, press it inside the reset hole for a few seconds until the Ryoko display shows that the device is resetting. The device then automatically restarts.
Put the back cover on.
The device is now reset.
® 2024 Ryoko All rights reserved.


