
Ryoko Mobile Wifi User Guide
👋 Hi! Our team is happy introduce you to a short guide how to use Ryoko Mobile Wifi. Click on the topic that interests you.
Setting Up Your Device Using additional features Resetting To Factory SettingsSetting Up Your Device
-
Turn on Ryoko by pressing and holding the power button on the top-right side of the device, until the screen lights up.
If the device does not turn on, charge it first by using a USB-C cable (included in the packaging). Connect the cable to the USB-C port at the bottom of the Ryoko device to start charging.

-
Once Ryoko is turned on, choose the most convenient way to connect:
-
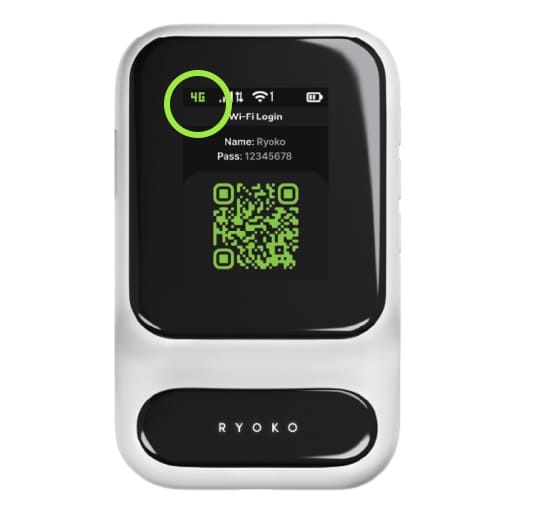
Connect automatically by scanning the QR code
-
Or connect manually by using the Wi-Fi name and password. Both the QR code and the Wi-Fi details are displayed on the Ryoko screen.
-
-
You can connect your phone, laptop or any other Wi-Fi capable device. You can connect up to 10 devices at the same time.
-
That’s it! Once you connect to Ryoko, you can check your signal strength, the number of connected devices, and battery level at the top of the Ryoko screen.
Using additional features
-
Ryoko comes with a pre-installed Viaota SIM card with additional benefits.
These include the ability to monitor your data usage directly on the device's screen and automatic ad-blocking. These features are exclusive to the Viaota SIM card.
-
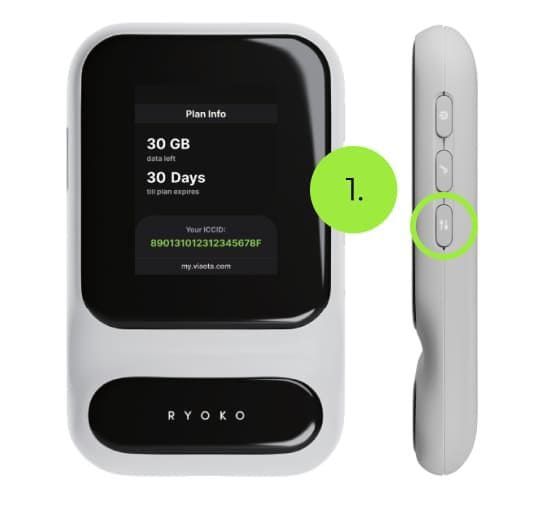
Monitoring your data usage: Click the Menu button once to see how much data you have remaining.
This button will take you to the Plan Info screen. If Ryoko is connected to the internet, it will show how much data you have remaining.
At the bottom of the screen, you can see the link to Viaota's self-service portal and the SIM card's ICCID, so you can easily manage it in the portal.
-
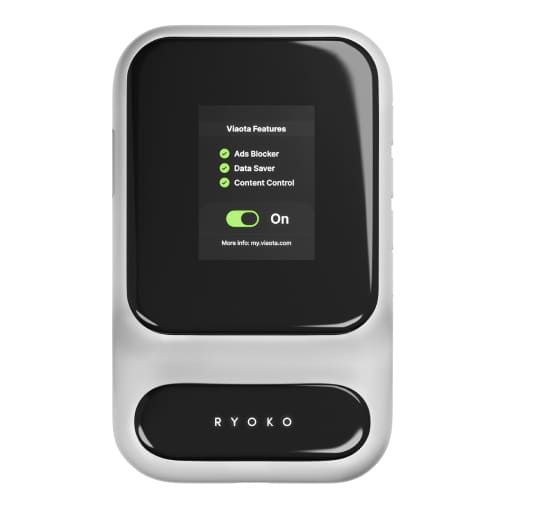
Enable automatic ad blocking: Viaota can help you stay safe online by blocking ads, trackers, malware and phishing. To enable this feature, follow these steps:
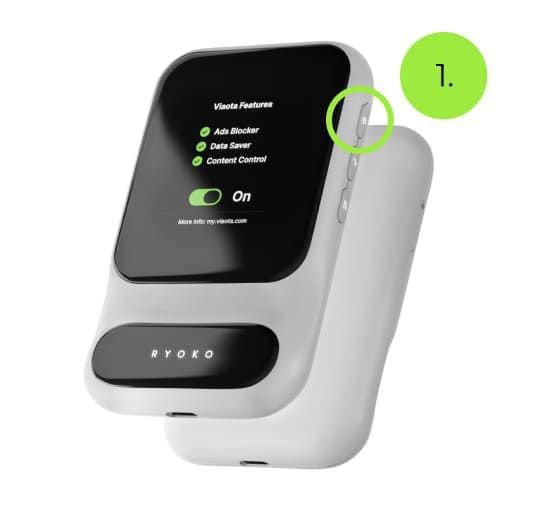
1. Click the Menu button once more. This will take you to the Viaota Features screen where you’ll see a toggle. The toggle indicates whether the feature is on or off.

-
2. Click the Checkmark button on the side of your Ryoko to enable or disable the feature.
Note: Automatic ad protection works by blocking network requests to known ad networks or malicious websites. If you ever experience connection issues to websites you trust, please disable this feature and try again.
Resetting To Factory Settings


In case Ryoko does not work as expected, you can reset it in two ways:
Press and hold the Power button for about 10 seconds.
After about 5 seconds of holding the Power button the screen will light up and show the Power Off message. After another 5 seconds, the screen will light up again and show the Ryoko logo. This indicates that Ryoko was successfully restarted.
For advanced users only:
In case you need to reset Ryoko to factory settings, you can do this by logging into the Web Management page.Ensure that the network connection between your Ryoko and the device with which you plan to log into the Web Management page is established – the device is connected through Wi-Fi to the Ryoko.
Open a browser and type http://192.168.0.1 into the address bar. Enter the username and password to log in to the web management page (both the username and password are “admin” by default).
After login in, go to Settings which you will find in the menu on the left. Then click Device settings and Reset. Here you will see the Reset Factory Settings screen. To reset the device to factory settings, click the Reset button.
® 2026 Ryoko All rights reserved.


